This is a very cool video demonstrating an easy and simple homemade crossbow
plan anyone can follow.
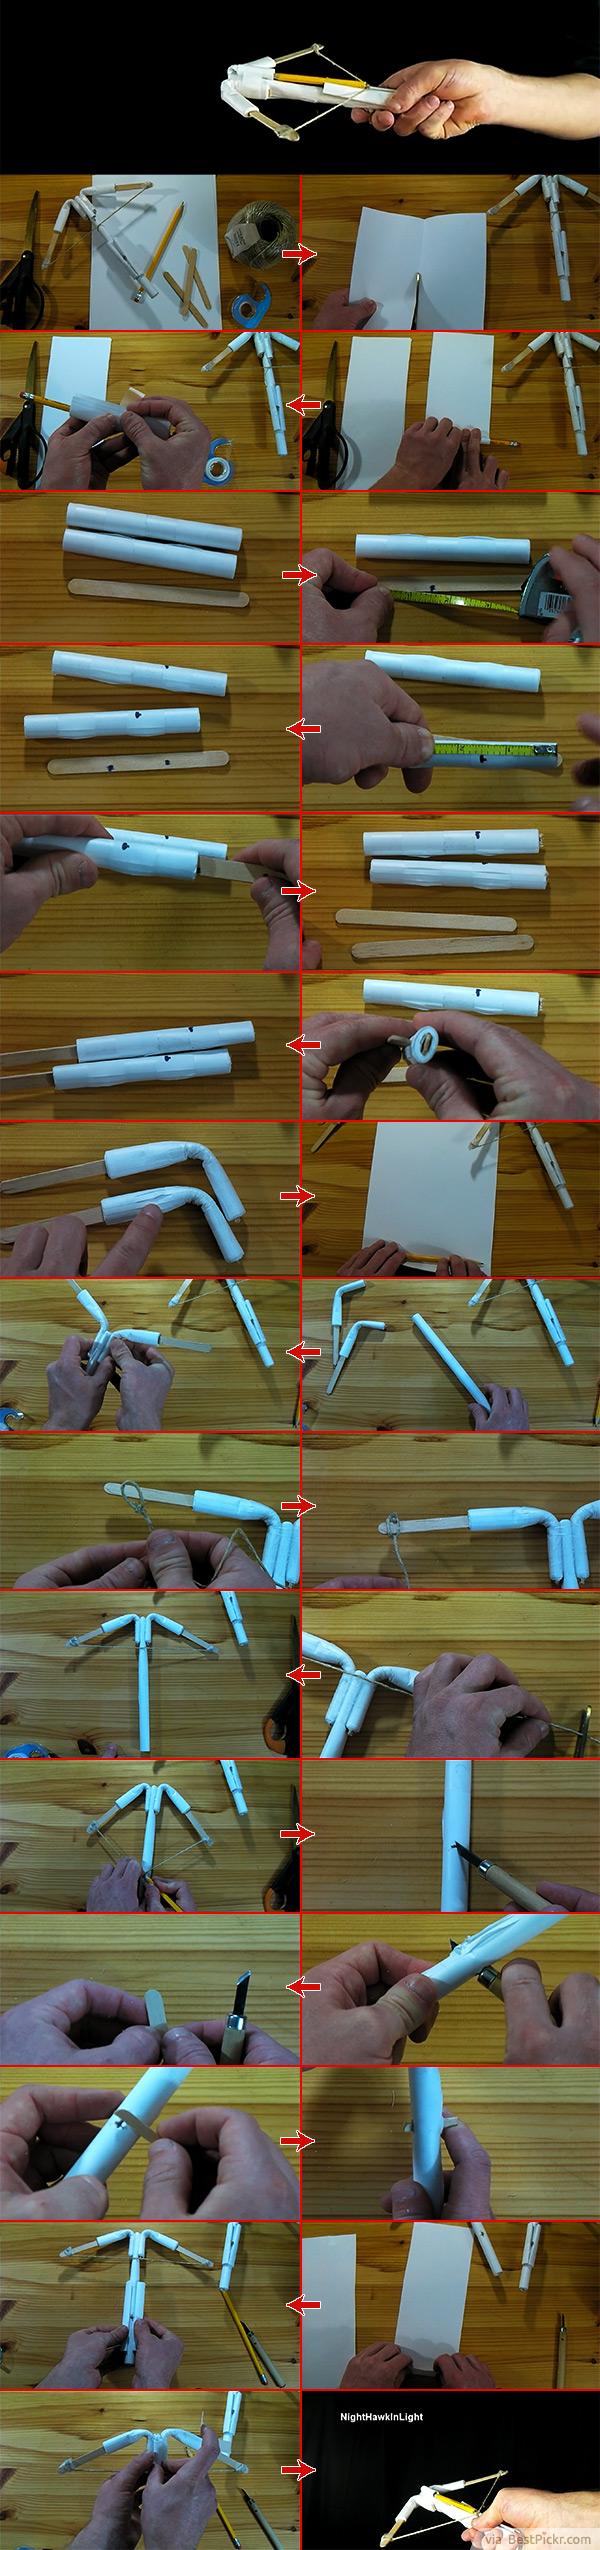
How to make a paper mini crossbow design step by step:
- Take 4x sheets of A4 paper and fold them in halves length-wise then cut them into 8 strips
- Roll 4x sheets together around the pencil very tightly and secure the two rolls with tapes.
- Measure and mark 1.5 inch from each ends of the popsicle stick. Do the same marking, but only on one end of both rolled tubes
- Insert the stick into the tube up to 1.5 inch deep as marked and break the stick.
- Push another popsicle stick through the other end of the tube, at 90 degrees against the previous wood stick.
- Before bending the tubes, to improve support and prevent the paper tubes from tearing, put three pieces of tapes lengthwise around the marked dot, then tape around it one more time to increase durability.
- Now bend both tubes just beyond the marked dots (slightly toward the center of the tube)
- For the main tube of the crossbow, take 5x sheets of paper and again roll them tightly around a pencil and finally secure it with tapes.
- Securely attach the two paper crossbow arms you just made to this main tube with lots of tapes.
- Tie a Bowline Knot in one end of the twine.
- Make a slip knot and tie it into one end of the arms, then secure into place with tapes
- Pull the string tight to the other end of the bow line and cut the twine just about 1 inch pass the end
- Make another knot and slip the string to the second arm. Again secure it with tapes.
- Pull the string back until you get the crossbow arms to form a square, then mark the position on the main tube.
- Poke the tube with a craft knife where you just marked and make the hole all the way to the other side of the tube. Then widen the hole a little bit so you can swing the knife to one side about 30 degrees.
- Take one end of the popsicle stick and split into half
- Slip this split stick through the hole you just made to create the small crossbow trigger
- Take another piece of paper, cut it into two halves lengthwise and roll the two halves around a pencil again to create rear guide support.
- Flatten these two tubes and attach them to the main crossbow tube around the trigger.
- Cut out another strip of paper and roll around the pencil loosely (just enough so the pencil can easily slide through) to create the front tube that will hold the pencil in position before launching. Then mount it to the front of this pencil crossbow.
Have fun and happy shooting your diy crossbow!

